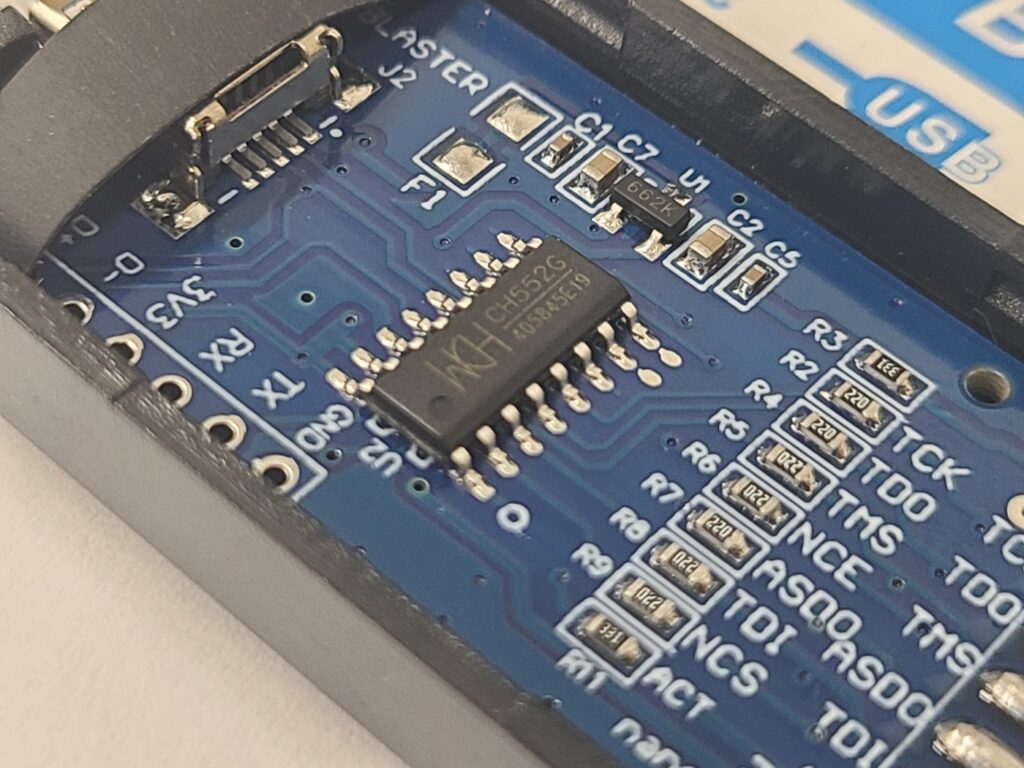
Chinese engineers have developed a low-cost USB-Blaster equivalent tool based on CH552G microcontroller to work with INTEL (ALTERA) CPLD/FPGA. The problem is that the preloaded firmware doesn’t work reliably.
CH552G is an 8-bit 8051 MCU that has a fair number of features for the price (<1$).
Doug Brown posted a practical step-by-step guide for reflashing the CH552G microcontroller with a properly working firmware he has developed.
All key instructions below are taken from Doug’s article and the comments thread.
Quick checklist (the short version)
- Open the case and solder or temporarily connect a 10 kΩ resistor between D+ and 3.3 V (or briefly short D+ to 3.3 V) to force the CH55x into its USB bootloader.
- Choose a flashing tool:
- Windows: WCH ISP Tool / WCHISP_Studio (recommended by commenters).
- Linux: use the isp55e0 C tool (works reliably) or the Python ch55xtool (may need extra udev/libusb fixes).
- Load/point the tool to usb_blaster_v1.1.0.bin (Doug provides the release in his GitHub fork) and flash.
- Remove the resistor/short, unplug/replug — device should enumerate as “USB-Blaster” (Altera idVendor/idProduct).
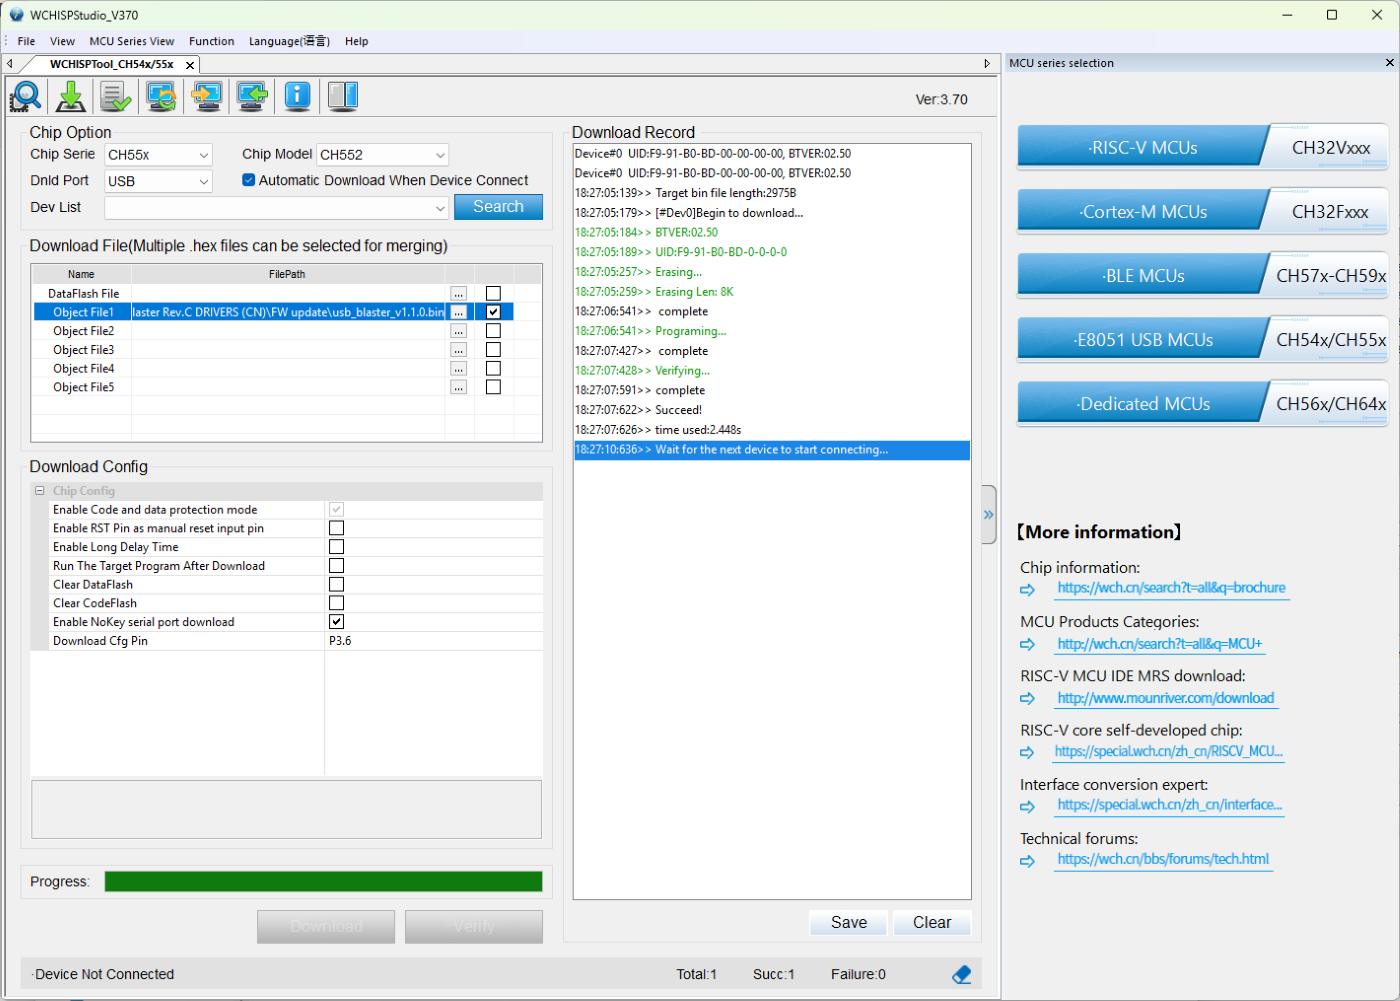
One of commenters with nick name KUKUS posted step by step instructions to flash the CH552G with WCHISPStudio:
– install CH375_DRIVER (CH372DRV.EXE from WCH website)
-! driver CH372DRV.EXE can be renamed CH372DRV.CAB and files be extracted with Winzip/RAR etc.!
– open plastic case, add 10k resistor between D+ and 3V3
– install WCHISP_Tool3.7 or latest WCHISP_Studio (better!) (WCH website)
– if device not detected update driver from via Device_Manager using driver files from extracted .CAB
– make sure to select CH55x/USB chip model CH552
– Object File1 = load the usb_blaster.bin file here and check box on the right
– Make sure “Enable RST Pin as manual reset pin” and “Run the Taget Program …” are NOT checked !
IMPORTANT!!
– ! Make sure “Automatic Download When Device Connect” is CHECKED !
– insert device on USB2.0 port.
– it will automatically download usb_blaster.bin file in device flash memory
– remove 10k resistor from D+ and 3v3
– Plug in USB => You now have a fully functional “Altera USB Blaster Device”
Tested and working in Quartus Standard 24.1 as per 2025.
Important tips & gotchas
- Use the 10 kΩ resistor method (connect D+ to 3.3 V through 10 kΩ) rather than hard shorting longer than necessary — it’s safer and worked for many commenters. After the flash, remove the resistor before rebooting.
- If you see the device enumerating as vendor 09fb product 6001 (Altera USB-Blaster) after reflashing, that’s the expected result.
- Newer Quartus versions can sometimes have issues with older clone adapters. Doug notes Quartus 18.1 tends to work well; very new versions (e.g., 24.1) can sometimes hang during programming for some clones. If you hit tool issues, try Quartus v18.x or community advice in the comments.
- If Windows tools blue-screen or misbehave before reflashing, finishing the CH552G reflash (and using Doug’s updated firmware) fixed the device for many users.
Links (from the article)
- Doug’s blog post: https://www.downtowndougbrown.com/2024/06/fixing-a-knockoff-altera-usb-blaster-that-never-worked/
- Doug Brown’s GitHub fork (of Vladimir Duan source) + FW binary file release (contains usb_blaster_v1.1.0.bin): https://github.com/dougg3/CH55x-USB-Blaster
- Vladimir Duan’s GitHub with initial (unfixed) CH55x sources:
https://github.com/VladimirDuan/CH55x-USB-Blaster